What do you do when you want to try a new recipe but you do not have the exact same ingredients? You adapt it, cross your fingers and hope for the best. Oh, and do lots of research!
At the beginning of the lockdown I had little flour left in my pantry. Most of it was “alternative” flours such as coconut, quinoa and chickpea. None of these are suitable to make bread or any kind of dough that you want to see rise. The shops offered little as most people started pouncing on and hoarding flour and started baking like never before. I found dark rye (yay to being healthy!) and spelt, unfortunately white, but beggars cannot be choosers.
Last weekend, inspired by the constant flow of video links to bread recipes, and having read a number of articles written by professional bakers on how to replace strong bread flour with other flours, I decided to indulge my husband’s constant desire for pizza. Except, I decided I would try focaccia instead.
Pizza vs Focaccia
There is a little difference between the two. The latter is usually “deep pan” and may be consumed simply as any other type of bread. It usually comes in rectangular shapes and is cut in large chunks. The former (pizza) comes in thin crust, medium or deep pan. The depth and variety very much depends on the part of Italy where it is made and personal taste. Pizza is, almost without exception, round in shape.
Whatever you make, the base is a bread. Meaning if my experiment turned out ok I would also have the tools to make a nice loaf of bread, perhaps to slice and turn into sandwiches.
I have talked about the health benefits of rye flour before in my post about sourdough bread (click here to read more) . However, I did not have four days or more to create a sourdough starter, so I used instant yeast (I know, I know). But sometimes, compromises are necessary and it would help keep the hubby happy (read about the importance of relationships and happiness for your health here).
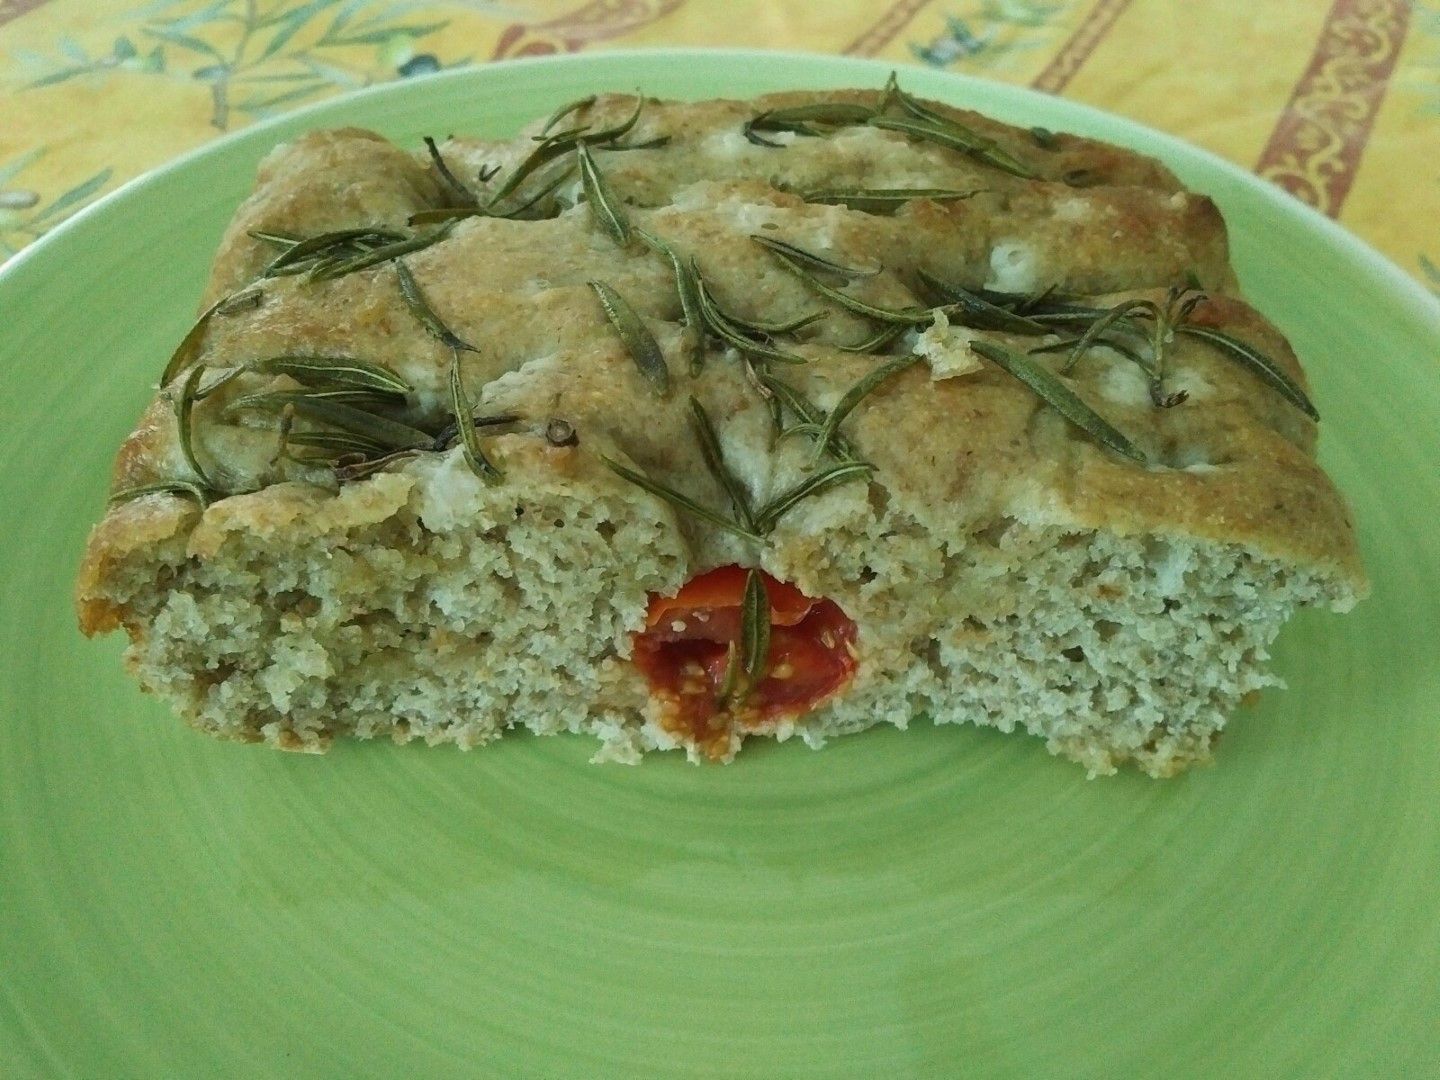
I am happy to report the focaccia was a success, both culinary and in satisfying the cravings for some comfort food. It also kept me busy at regular times during the day. In fact, I am not sure it is a recipe I would attempt on a busy day at work as it requires attention.
I should also add that the original recipe (using strong white bread flour) called for two proving periods of 45 minutes each to let the dough rise. Mine took several hours, but well worth the wait!
Dark Rye and Spelt Focaccia
Ingredients
For the bread base
100 g Dark Rye flour
300 g Spelt flour (white)
4 teaspoons baking powder
1 sachet of instant yeast (mine was 10g)
½ teaspoon of honey
approximately 300 ml of hot water
extra virgin olive oil (approx. 6 tablespoons)
Additional ingredients
a handful of fresh rosemary
a handful of cherry tomatoes
Method
1. Heat the water. I heated mine in a kettle and used approximately two thirds of the total hot, straight from the kettle, then added room temperature water to make up the rest as in the past my water was always a bit too cold, too quickly. However, do not use boiling water as this can kill the yeast! Pour it into a (heat resistant) glass bowl and mix in the sachet of instant yeast using a fork. To make sure the yeast is activated you can also add half a teaspoon of honey and mix well. Allow the yeast to get activated, 1 to 2 minutes. You may see some small bubbles forming (and it will not smell very nice!).
2. Using a separate bowl, mix the rye and spelt flours with the baking powder with a whisk.
3. Add the flour mixture to the glass bowl with the yeast, whisking all the time so all the flour is fully absorbed. You should end up with a smooth, soft and slightly sticky dough (rye is more sticky than other flours). If the mixture appears too dry and there is excess flour add a little more warm water, if too sticky add a little more flour.
4. Turn out the dough into a floured surface and knead for approximately 5 to 10 minutes until you get a smooth consistency, adding a little more flour as needed if the dough becomes too sticky to handle. After kneading, mine was quite a soft ball of dough.
5. Take a wooded chopping board, flour it, and place the dough ball on it and cover with the glass bowl still moist from the yeast mixture. (if it is too sticky, wash it quickly but don’t dry it completely). Allow the dough to rise slowly in warm place away from direct sunlight. Avoid the temptation to lift the bowl to look at it (hence the transparent glass bowl!!). Cover with a clean, dry tea towel.
6. After about 5 hours mine had expanded nicely, not vertically so much as horizontally. It managed to displace and lift the bowl by about 2 centimeters. (If you do not have 5 hours you could move it to the fridge after it starts reacting and leave it in there overnight.)
7. Here is where I moved onto stage two. Take a deep baking tray (mine was a rectangular oven proof glass, I used a 26cm x 17cm x 5cm tray) and flour the bottom well to prevent the dough from sticking.
8. Take the dough and stretch it to a rectangular shape to fit all the way round your tray. Then using all four fingers of right hand, press them into the dough all the way down, so that you end up with a dough which has “holes” at regular intervals throughout, about 1-2cm apart.
9. Now use these to add your additional ingredients. I used cherry tomatoes and fresh rosemary (previously dipped in olive oil), but you can use whatever takes your fancy (see below for ideas).
10. Moisten the top with a generous dose of olive oil, then take a clean tea towel, run it under the tap so it is nice and wet, fold it in two and cover the top of your tray. Leave the dough to prove a second time for a minimum of 45 minutes. Mine was proving just over 3 hours.
11. At this point the dough should have risen again and the ingredients you pressed into the dips you made will appear to have sunk into the mixture.
12. Heat the oven at 200°C. Meantime feed the dough again with olive oil all over the top. Sprinkle some salt (and rosemary) over the top and carefully transfer the tray into the hot oven. You want to keep the air in the dough so close the oven door gently.
13. Bake for approximately 20 minutes until the top is slightly golden (dark rye is already dark so don’t expect to see much difference) and a toothpick inserted in the middle comes out clean.
14. Allow it to cool down a little before cutting. Serve with a nice green veg side salad.
This shows that you do NOT need strong flour or bread flour or even self raising flour for your recipes. You can adapt a plain, all purpose flour by the addition of baking powder. Approximately 1 teaspoon for each 100g, depending on the type of flour used.
Also, remember that rye in general, and spelt to a lesser extent, both have much lower gluten content than white (wheat) flour. If you are expecting the above focaccia to be as light and airy of a more traditional white (wheat) flour focaccia then you might be very disappointed. Dark rye always gives the bread a much thicker consistency. I personally like it, but it is not to everyone’s taste.
I kept the salt content in my recipe quite low. But there is nothing stopping you from adding more salt to the top, or dough, as rye tends to be sweeter.
Adding flavours
As for additional ingredients, go for whatever you like the most. The sky is the limit. Anchovies would work well here, as would black olives (pitted please!). Something strong and a little salty to contrast well with the natural sweetness of the bread base such as feta cheese and sundried tomatoes would also be good.
Whatever you make yours, enjoy!